
Instructions | Video Guide | FAQs
Instructions
Open a Spotlight Search, search for “print center” and open the Print Center app


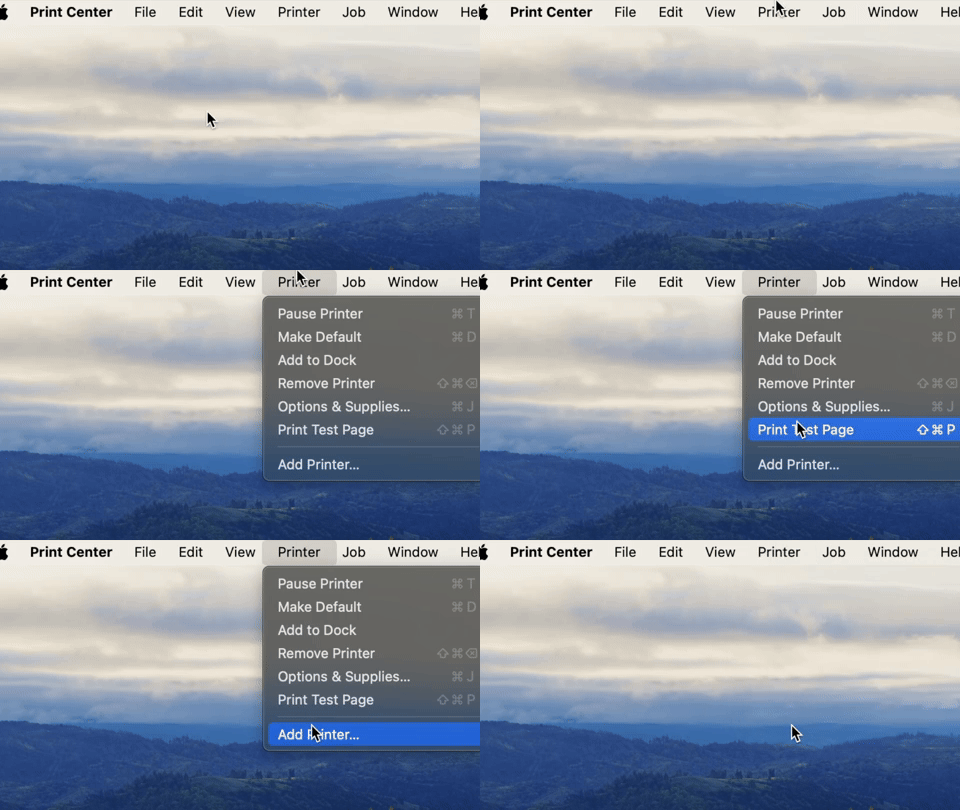
From the top menu, select Printer > Add Printer
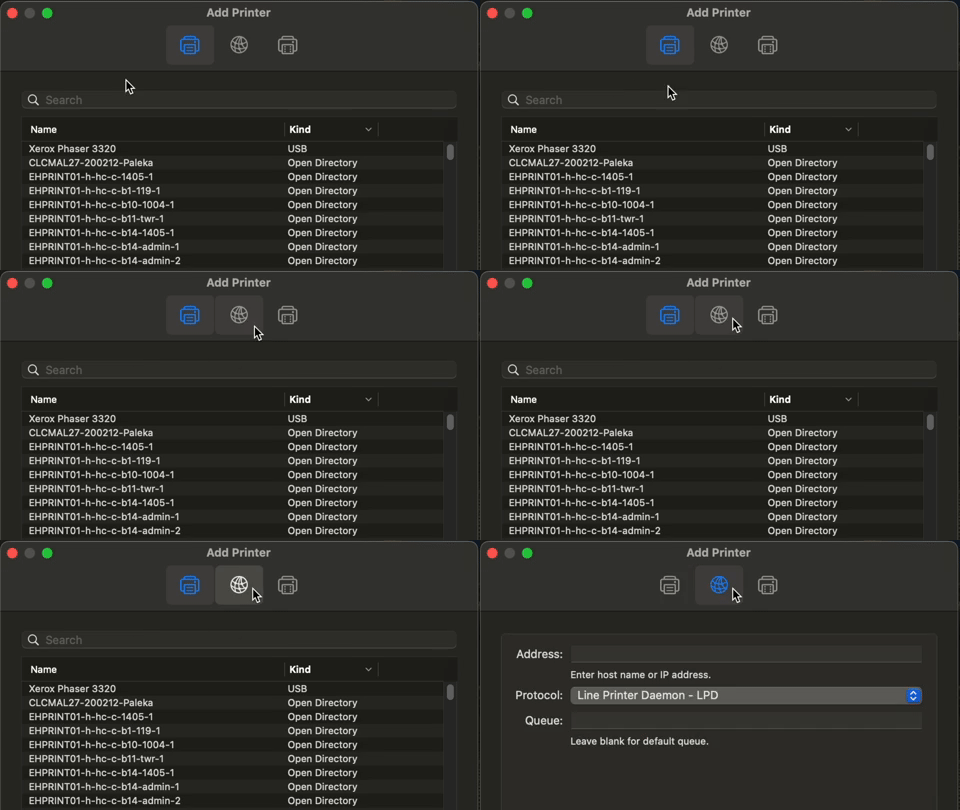
Click on the middle Globe icon to add by host name / IP address
Enter the Print Queue Host Name in the Address field
Protocol: Line Printer Daemon – LPD

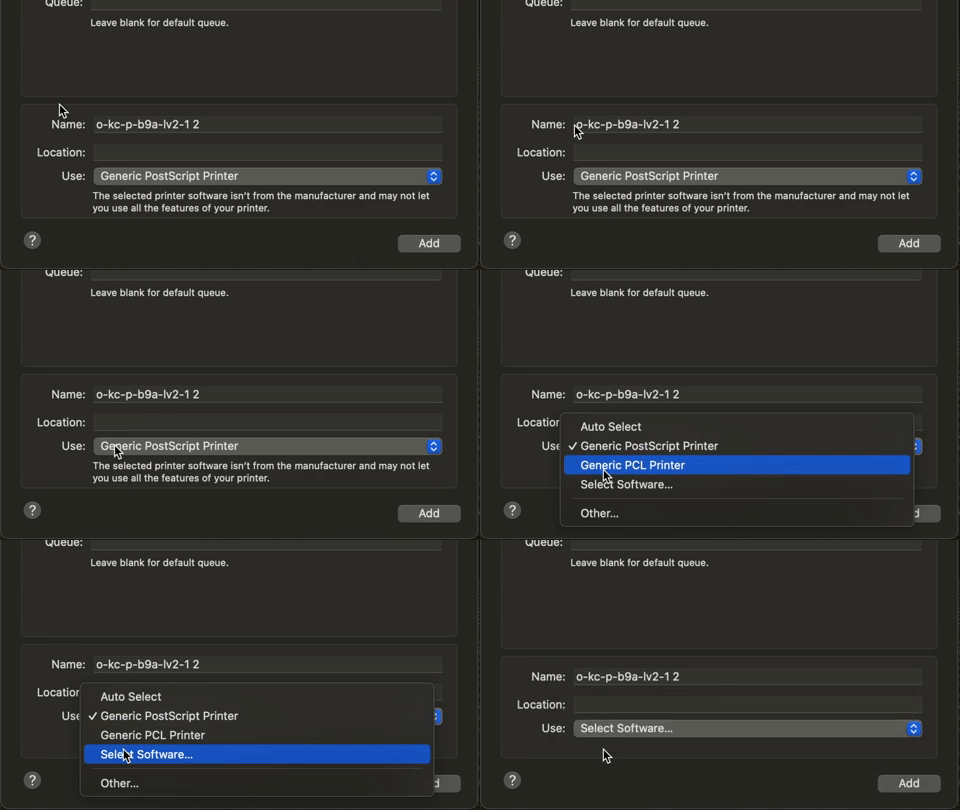
Click on the dropdown menu to the right of Use: and click “Select Software”
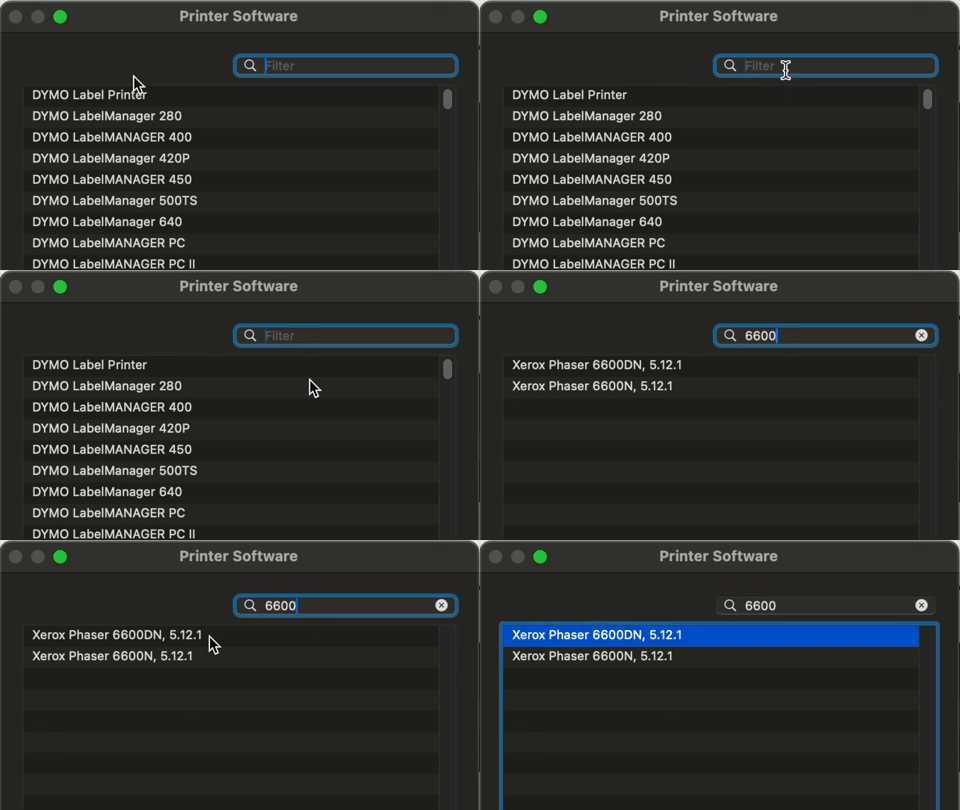
Search for and select the printer driver that corresponds with the printer model. Then click “OK“.
Note: most printer models on campus are Xerox C410
Click “Add” and follow the prompts

Video Guide
FAQs
I’m unable to add the printer after following the steps above.
- Ensure you are connected to the KS WiFi and Global Protect
- Check that your Private WiFi address is turned Off
- Click the WiFi icon in the top right hand corner > Wi-Fi Settings
- Click on the 3 dots in the circle next to KS_WiFi then click Network Settings
- The Private Wi-Fi address setting should be Off. If this is not turned Off, please visit a Wahi Lolouila to turn it off.
- Open Self Service and run the following apps:
- Fix AD Binding
- SS-Xerox Printer and Copiers 2025
- Restart your laptop
- Try again to re-add the printer using the steps above.
- If it is still unsuccessful, try to add the printer using the IP address (10.xxx.xxx.xxx) instead of the hostname (o-kc-p-xx-xxx).
- If none of these steps worked, please visit a Wahi Lolouila.