This page will provide information on how to set up your Easy Grade Pro student files. After you have saved the necessary student data files from KS Connect for each of your classes, please follow the next few steps to complete your Easy Grade Pro Gradebook.
Teacher Resources – EGP Templates:
These templates will include the proper term titles and corrected letter grade scale for KS. Please
Teacher Easy Grade Pro Template
Summer School Teacher EGP Template
Please view this demo tutorial if you need additional information:
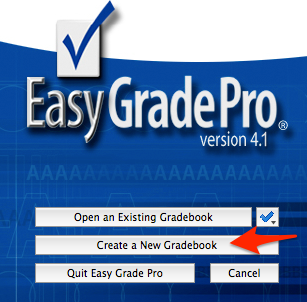
Open Easy Grade Pro (EGP) which should be located either on your docking station or in your Applications folder. Click on [Create a New Grade book].

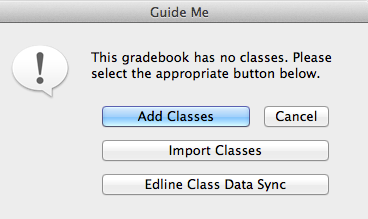
Step 1: Click on [Add Classes].
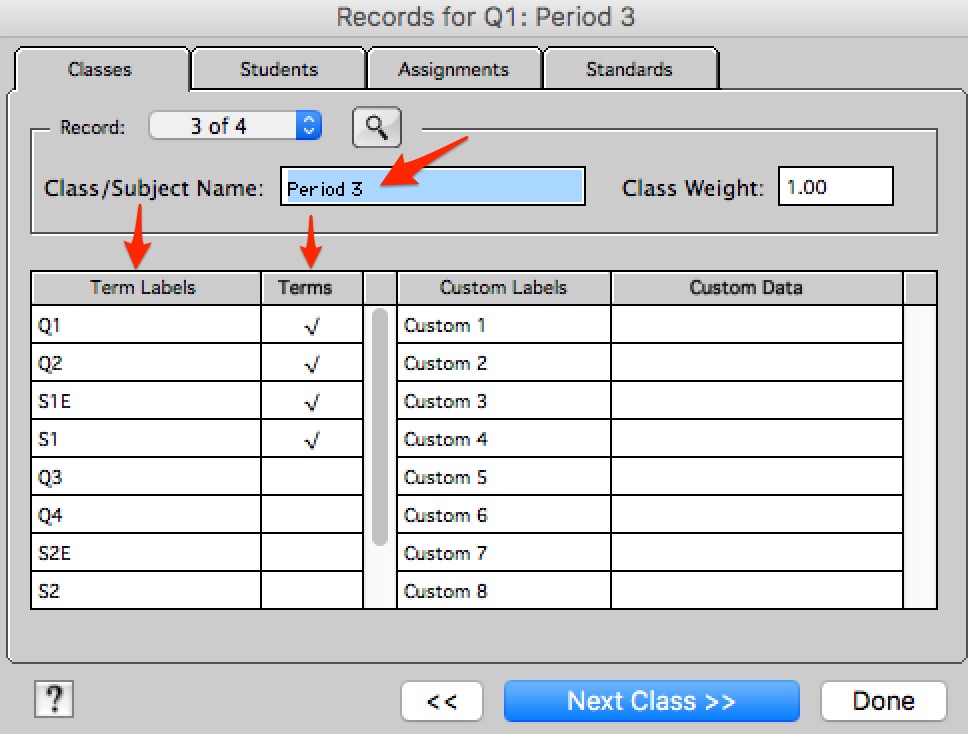
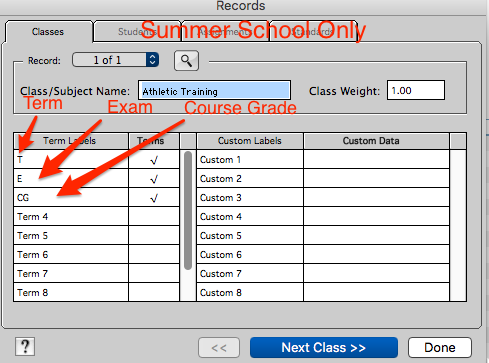
Step 2: Type in the term label names. You must have all the terms listed in your school’s section of “Terms for Easy Grade Pro (EGP) Gradebook”. If you have semester courses, you may want to uncheck quarters that are no longer in session. Don’t forget to name your class. IF you are a Summer School Teacher, you should be following this second picture.
Terms for EGP
**Repeat for all classes by clicking on [Next Class>>]. Click [Done] when finished.
Step 3: Choose your first class in your first term from the “Choose a Class” pull-down menu.
Step 4: Click on [View/Edit Class Options].
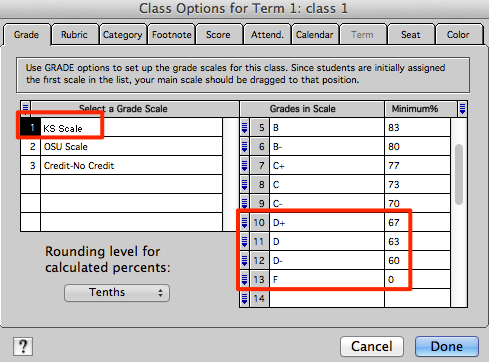
Step 5: Put in KS Grade Scale. (i.e. Add D+ and D- categories for KS scale). Check with your division for grade scale.
*If you use weighted grades, now click on Category.
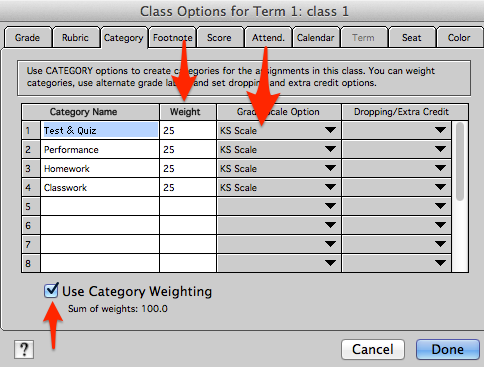
*In Category, click [Yes] on “Use Category Weights?”. List your category names and percentage weight for each.
*Click [Done] when finished.
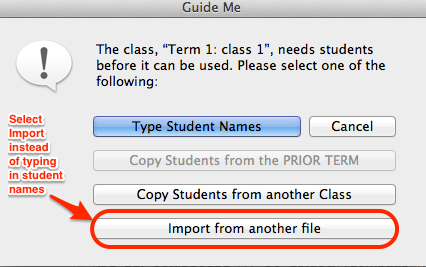
Step 6: A dialogue box will appear asking about students. Click [Import from Another File] found at the bottom of the window.
Step 7: Select [“Easy Import of Students”] and click on [Next].

Step 8: Select [Current Class]

Step 9: Select All Files from the pull down menu near the bottom. Then, find your saved file that you downloaded from KS Connect. Click on [Open].

Step 10: Now, type in Student Import in the field for Name of Format.
Step 11: Next, Complete pull down fields in right column to match the information in the left column. Use the table below to match the fields to the format of the file.
Make sure you add the Course ID as well. This is a new step that will ensure proper Course ID. Prior to this you had to copy it or add the information.
Click [Next].


Step 12: Now, click on [Import Selected Records].

Step 13: Click [OK] on “Import Results” window.

Step 14: Now click on [No]. By clicking Yes, you would then override what you just did for a course.

**Below is what your class list will look like in your Easy Grade Pro (EGP) gradebook after the process is completed.

Step 15: Choose your next class in your Grade book. Click [Import from Another File] found at the bottom of the window.

Step 16: Click on [Other Formats] and choose “Student Import”. Click “Next”.

Step 17: Select [Current Class].
Step 18: Then, find your next class file saved (.txt file) in KS Connect section and click on [Open].
Step 19: Now, click on [Import Selected Records].

Step 20: Click [OK] on “Import Results” window.
Step 21: Now click on [No].
