
Please post your initiatives. One more shopping week!
TechNotes Dec 07
Click Here: TechNotes Dec 07

Dragging and Copying Files
By default, when you drag a file, it simply moves it. However, there are times where you’d like to drag it in the same way but copy it instead. Try this: hold down OPTION KEY when dragging the files and the little green + icon will appear confirming that you are copying it. Cool!
December 10-14, 2007
Please post your initiatives. 18 more days ’til Christmas! 🙂
Creating a Podcast – GarageBand 3
Forcing An Application to Open a File
Use this tip when a file opens in the wrong application. For example, if I want a jpg file to open in Adobe Photoshop Elements instead of Preview.
Click on the file, hold, and drag the file to the icon in the dock that corresponds with the application you’d like to use to open the file.
With that said, here would be a solution to my example above: instead of double-clicking my jpg file and it opening in Preview, I should click on the file and drag it to Adobe Photoshop Elements so I can manipulate the file.
December 3-7, 2007
Please post your initiatives.
Where did I save this?
If you’ve ever saved something in multiple locations and have difficulty recalling where you’ve saved it later, you’ll probably appreciate this tip. To determine where a file is saved when the file is opened, simply push the APPLE key and click on the name of the file name at the top of the file window. 
A menu will appear that will give you “cookies” to show you where the file is saved.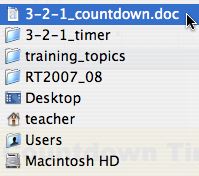
Quickly Highlight Web Addresses in Internet Browsers!
You could click and highlight the url or even click the icon before the url. However, there’s an even faster way to highlight the URL in a browser so you can type your next web address. Simply type APPLE + L. You don’t even need to move your mouse to take advance of this cool shortcut!
Super Zoom!
Need to show your students a tiny QuickTime video from a website? Or do you need to show students elements of a document? Try using your ZOOM tool on your Mac.
First, enable the zoom mode by pressing the APPLE + OPTION + 8 keys OR to SYSTEM PREFERENCES in the Apple Menu > UNIVERSAL ACCESS. Then turn the zoom on.
Next, press APPLE, OPTION, and +(Plus) to turn the zoom on, and APPLE, OPTION, and -(Minus) to turn the zoom off.
Inverse Mode
Want a cool screen? Try this!
Press your APPLE + OPTION + CONTROL + 8 keys to inverse your screen. This will invert all of the colors on your screen.
To get out of the inverse mode, type the same keys again.
Quickly Create Archives
Archiving files and folders creates a copy of the items in a compressed file. Archived files take up less disk space than uncompressed files, it is useful for sending information via email.
- Press SHIFT and click on all files you would like to archive.
- Press the right click button on your mouse and click on CREATE ARCHIVE in the menu.
- The archived photo is created and titled Archive.zip
- You can now send the archive file as an email attachment.
- Note: The email recipient will download the file, then double click on the Archive.zip file. The archive is then replaced by a folder that contains uncompressed copies of the original items.

Displays-Mirroring Off
Want to do your grades on your teacher laptop and have your students watch a dvd in class at the same time? Here’s how!
- Connect the lcd projector to your laptop.
- Go to SYSTEM PREFERENCES > DISPLAYS
- Uncheck MIRRORING OFF
- In the ARRANGEMENT window, arrange your menu/dock and windows you’d like people to view and you to see.
- You’re ready to multi-task!
1:1 Learning Program Parent Response
1:1 Learning Program Interview 3
What do you think about the 1:1 Learning Program at KMS?